Installation as answering machine
PhoneBlock offers you an intelligent answering machine that automatically only answers the call if the caller's number is listed in PhoneBlock's SPAM database. Just like for the setup of the blocklist, you do not need your own device or computer for this. You create a PhoneBlock answering machine here on the website and register it via the Internet on your Fritz!Box or another VOIP-capable Internet router. You can find out exactly how the PhoneBlock answering machine works here.
The following steps will take you to your PhoneBlock answering machine:
- Register with PhoneBlock
- Create answering machine
- Set up DynDNS in the Fritz!Box
- Setting up the telephony device in the Fritz!Box
- Switching on the PhoneBlock answering machine
- Test answering machine
The instructions will guide you step by step through the setup. The configuration in the Fritz!Box is not easy, but if you follow the procedure described here exactly, nothing can go wrong.
Step 1: Register with PhoneBlock
From here on, you will need three browser windows (or tabs). One for this guide, one for the PhoneBlock answering machine app and one for the configuration interface of your Fritz!Box
You are logged in as , great, let's move on to the next step!
Step 2: Create answering machine
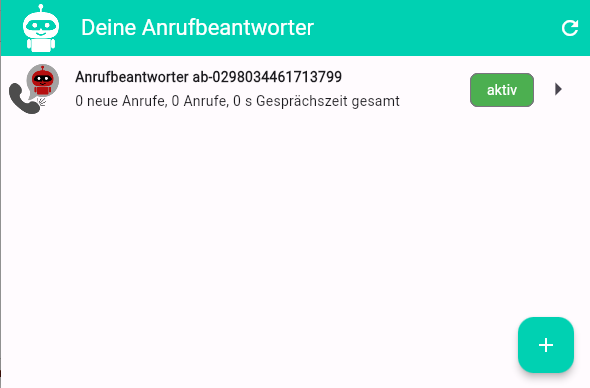
Clicking here opens a window with the PhoneBlock answering machine app. When you open it for the first time, the list of your answering machines is empty and there is a button at the bottom right with which you can create an answering machine. Press this plus button.

Step 4: Set up DynDNS
Your Fritz!Box box tells PhoneBlock its IP address via "DynDNS". This is necessary so that the PhoneBlock answering machine can find your Fritz!Box
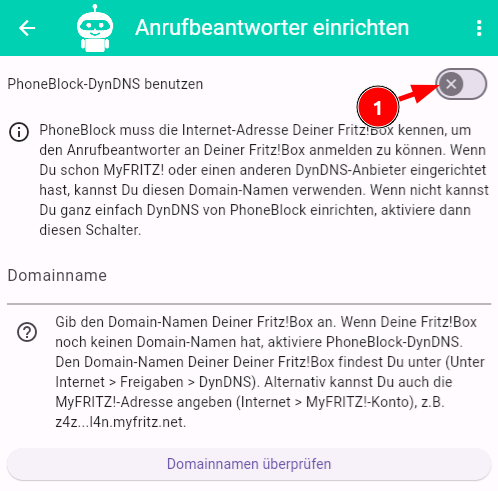
Activate PhoneBlock DynDNS
Activate the "Use PhoneBlock DynDNS" switch in the answering machine app (if you know your way around and are already using a different DynDNS provider, you can also enter the host name of your Fritz!Box)
On the next page, confirm with "Activate DynDNS".
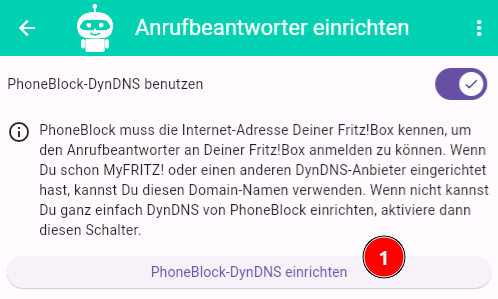
You will now receive access data for the PhoneBlock DynDNS, which you can enter in your Fritz!Box (see below).
Enter login data in the Fritz!Box
This link opens a window for your Fritz!Box. Log in there with your Fritz!Box password. If you have never done this before, you will find the password on the bottom of the Fritz!Box
In your Fritz!Box, navigate to "Internet > Shares" in the sidebar and select the "DynDNS" tab.
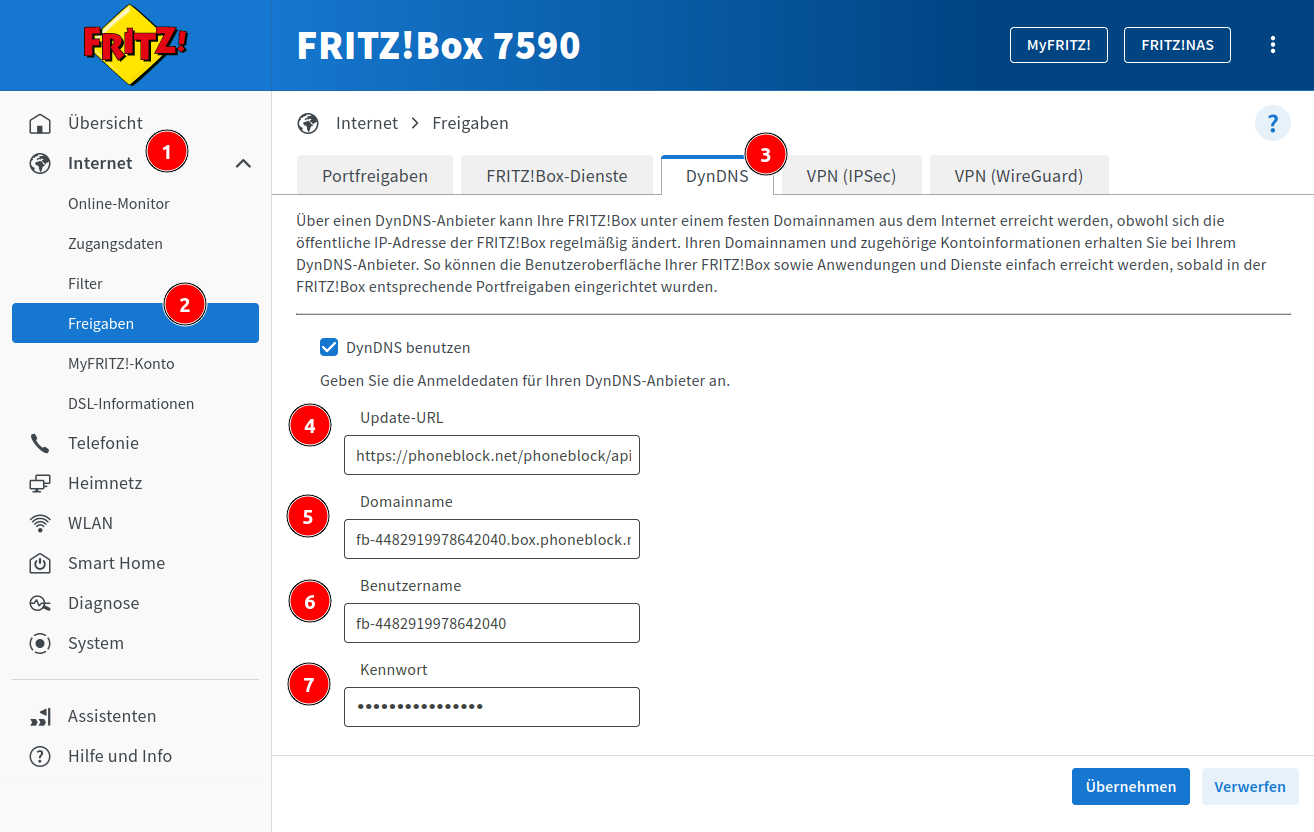
Copy the data for "Update-Url", "Domain name", "User name" and "Password" from the answering machine app and enter them in your Fritz!Box. And confirm with "Apply" (point 5 in the image below).
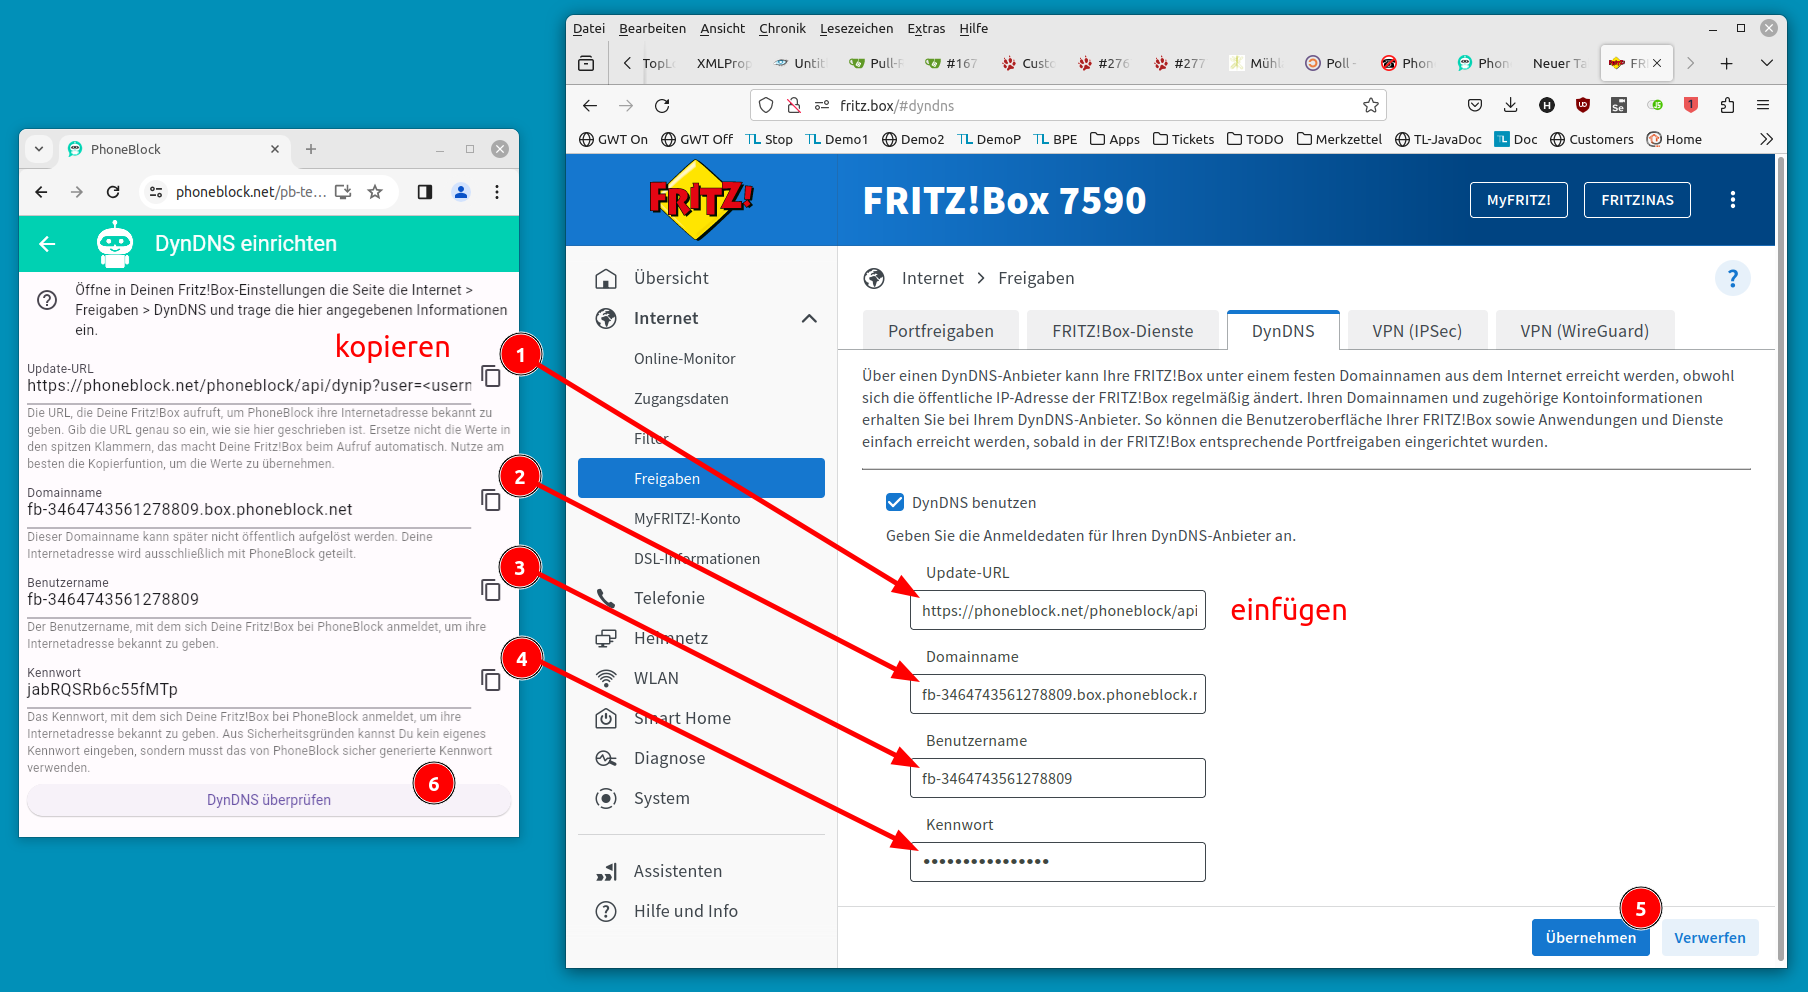
Check DynDNS
Now go back to the answering machine app and check the settings (point 6 in the picture above). If PhoneBlock has found your Fritz!Box, you will be taken to the next page with the access data for the actual answering machine.
Step 4: Setting up the answering machine in the Fritz!Box
The answering machine is now set up as a telephony device in the Fritz!Box To do this, open your Fritz!Box interface again.
Setting up the telephony device
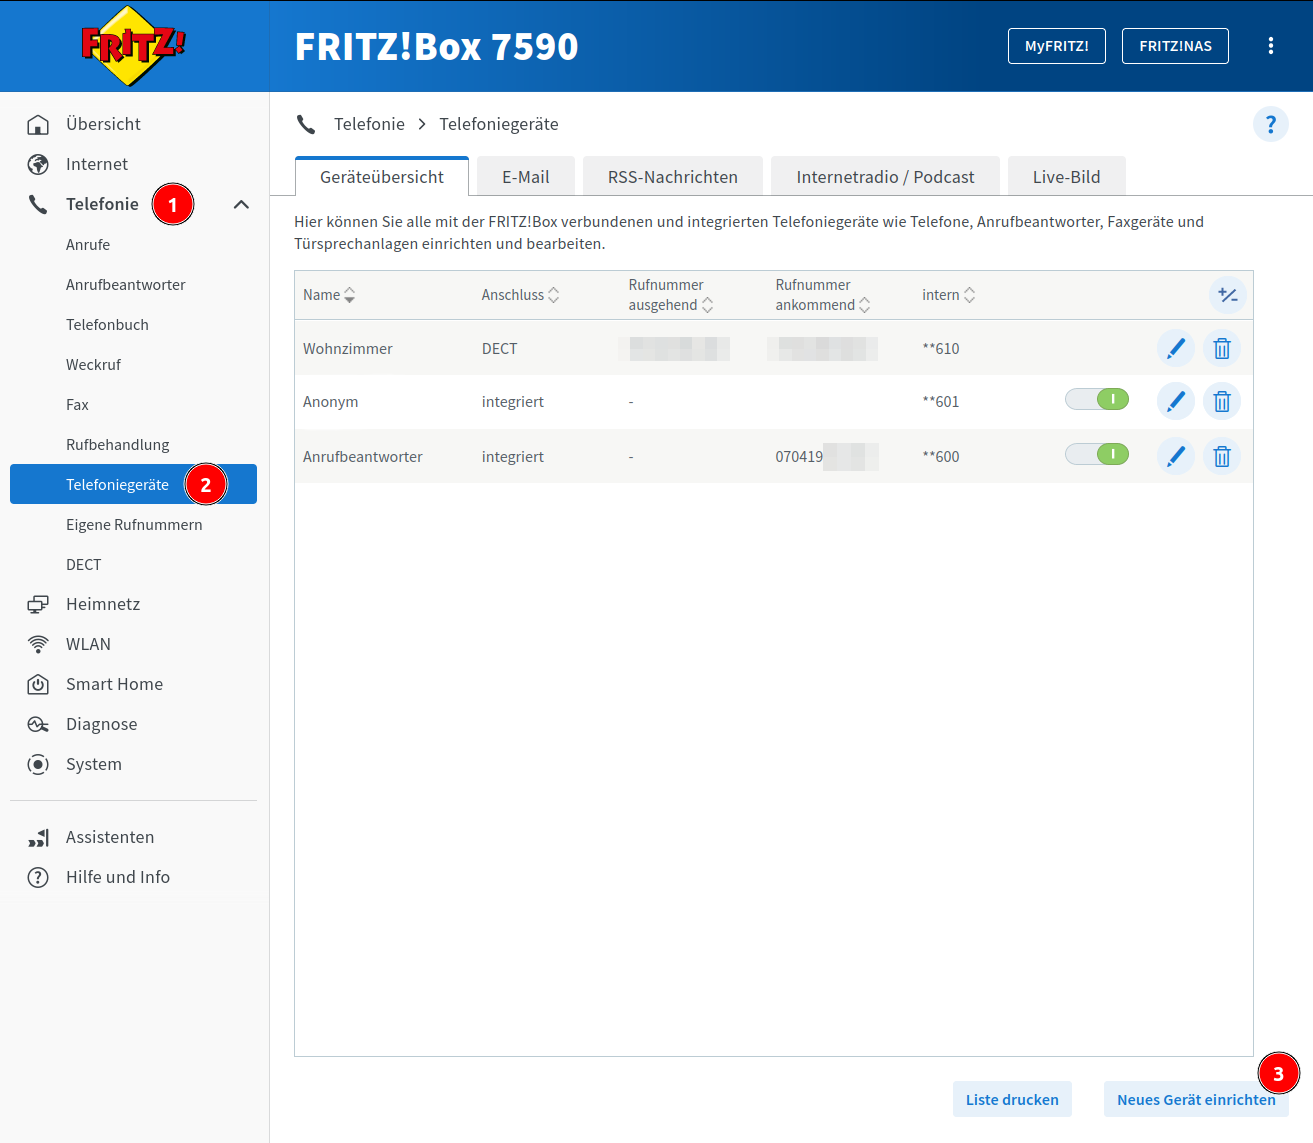
Navigate to "Telephony > Telephony devices" in the sidebar and click the "Set up new device" button.
Select the type of device
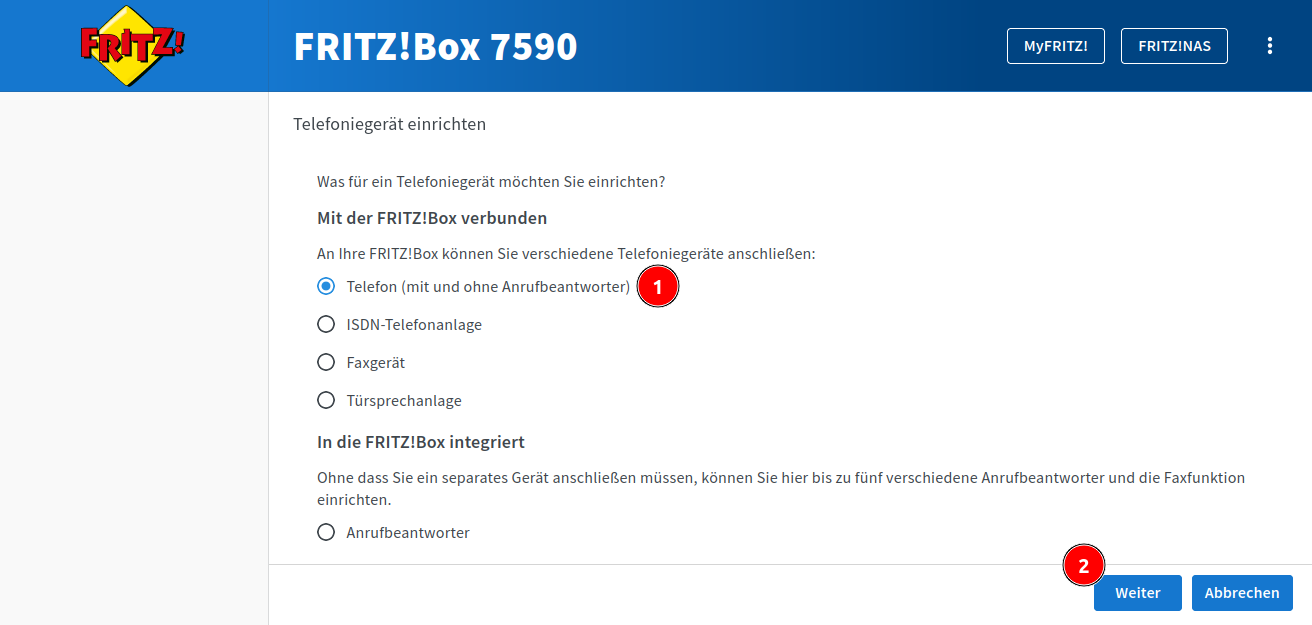
Select the option "Telephone (with and without answering machine)" and click on "Next". Note: Do not select the obvious option "Answering machine", as this can only be used to configure answering machines that are permanently installed in the Fritz!Box
Configuring the IP telephone
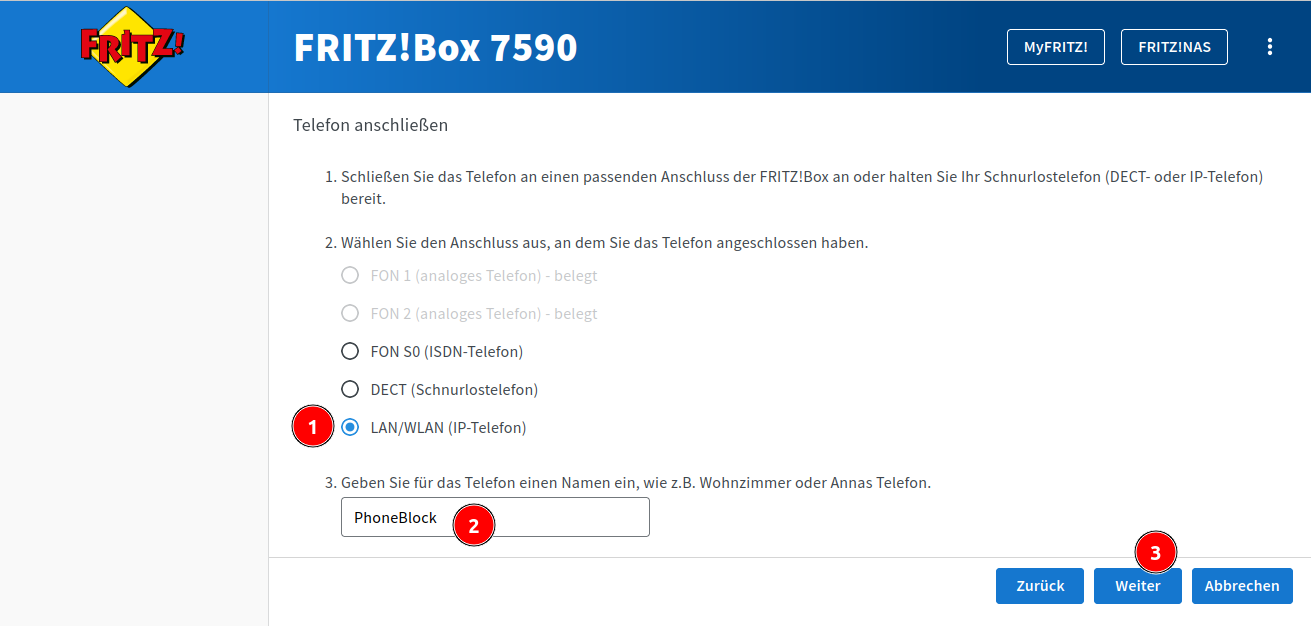
On the "Connect phone" page, select the "LAN/WLAN (IP phone)" option and give the new device the name "PhoneBlock" in the text field below. Then click on "Next".
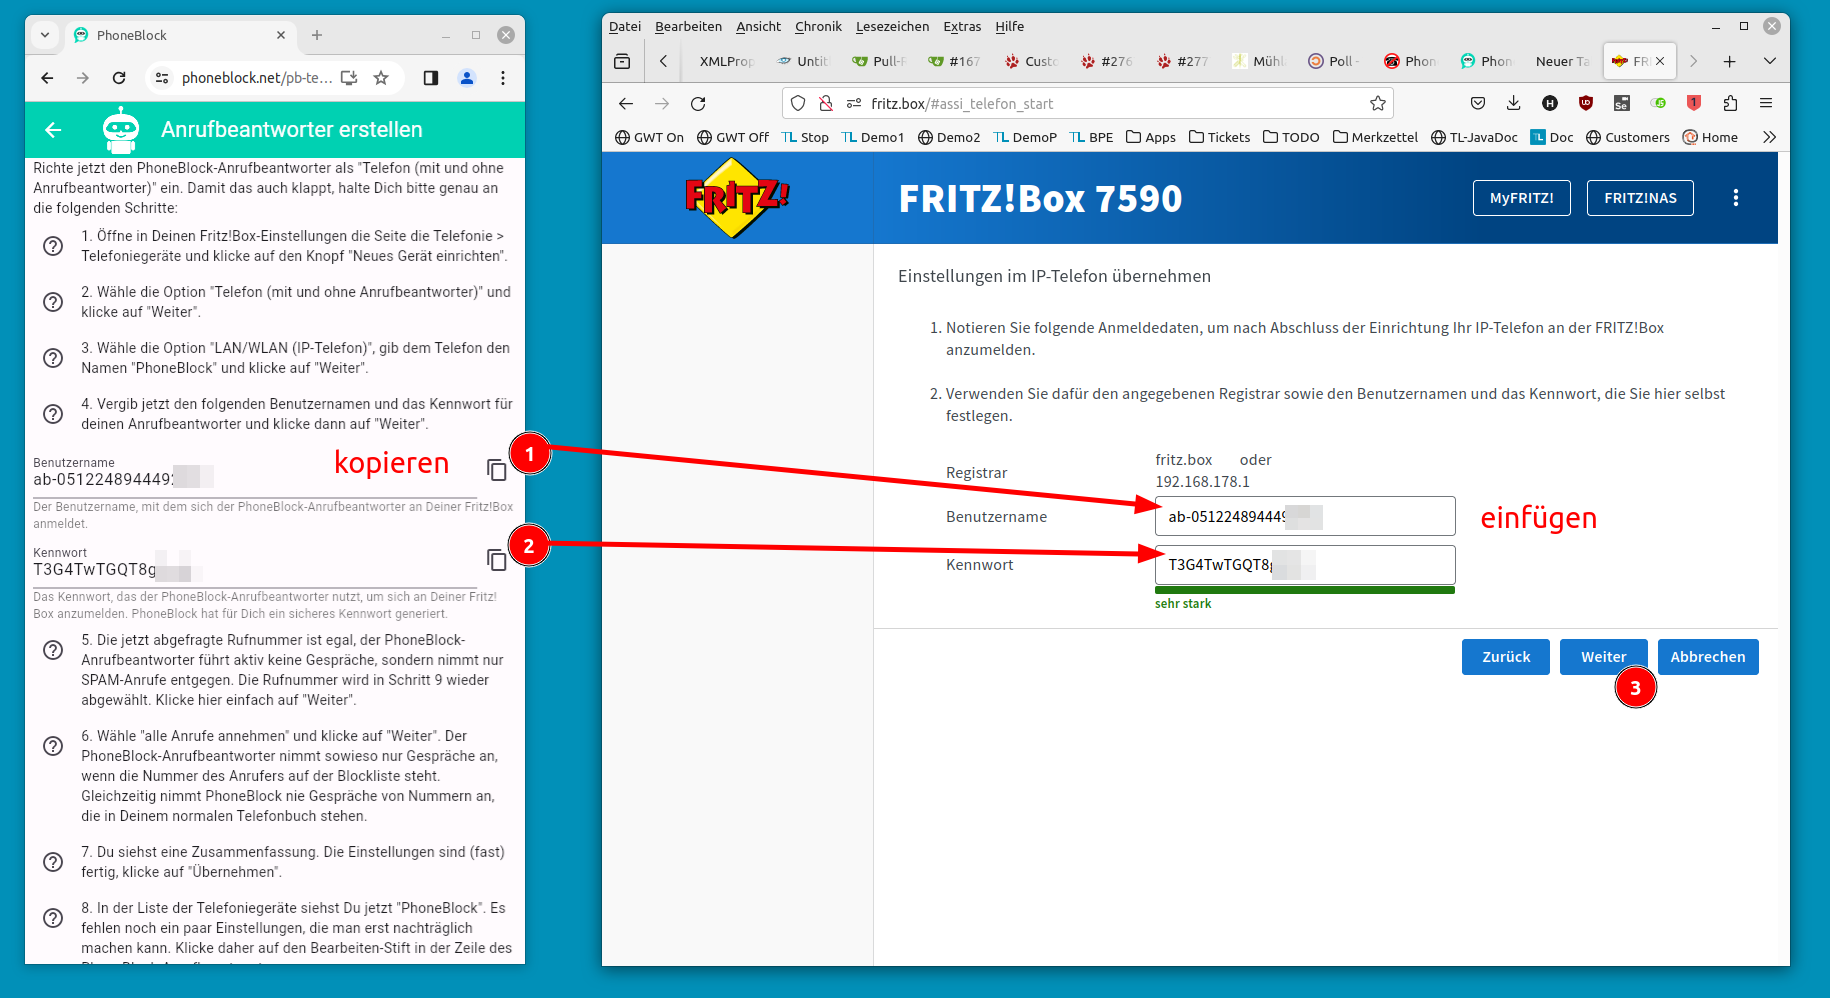
Transfer access data
On the next page "Apply settings in IP phone" you will be asked for "User name" and "Password". Copy the corresponding data here that is displayed in the answering machine app</x1 Click on "Next".
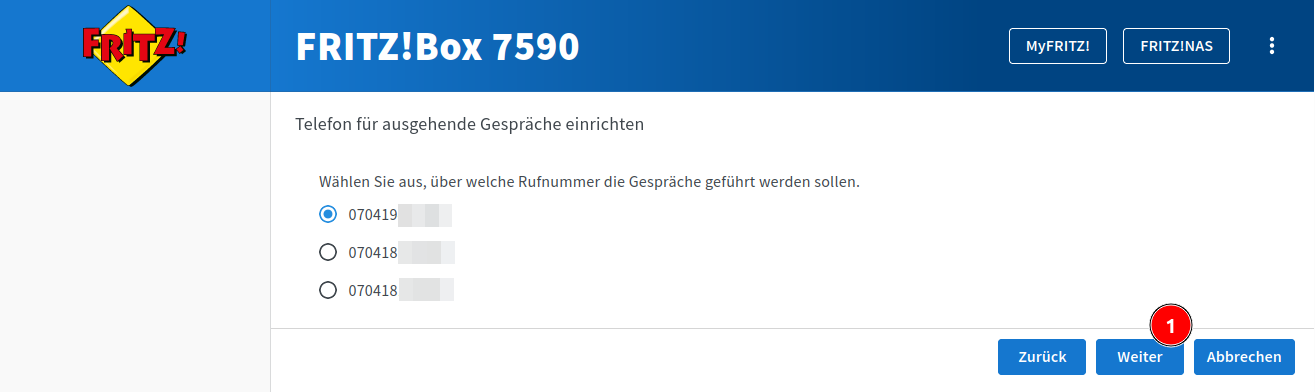
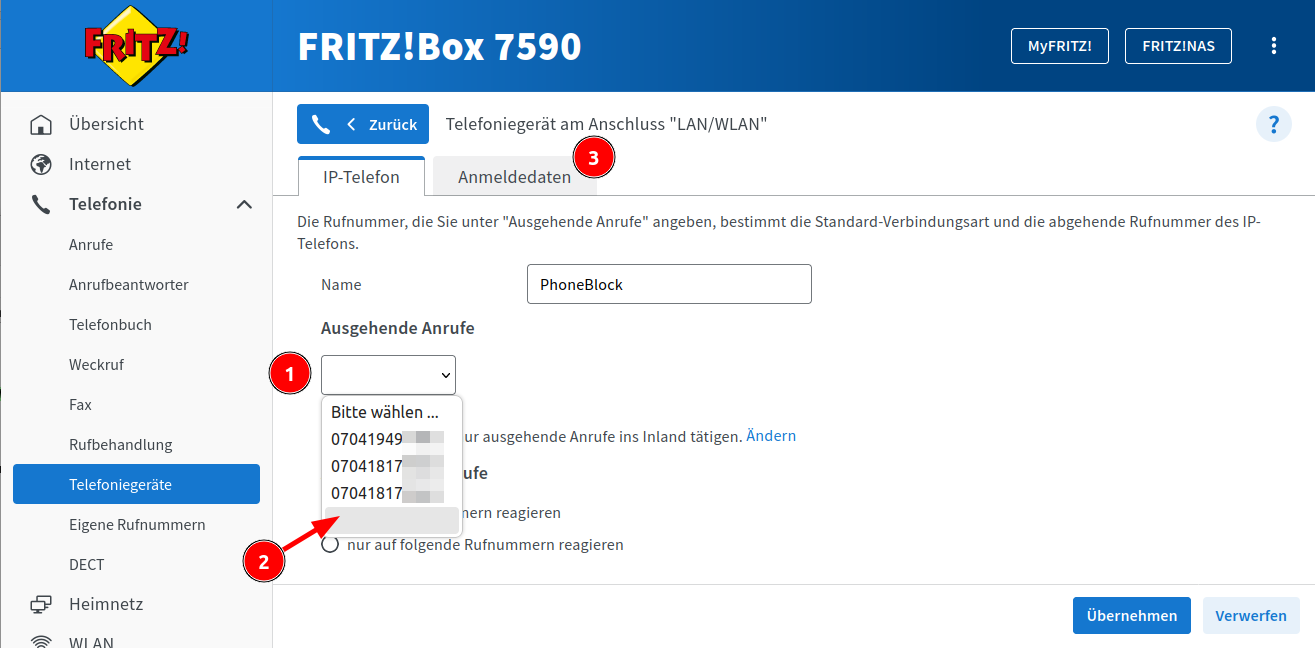
Settings for outgoing calls
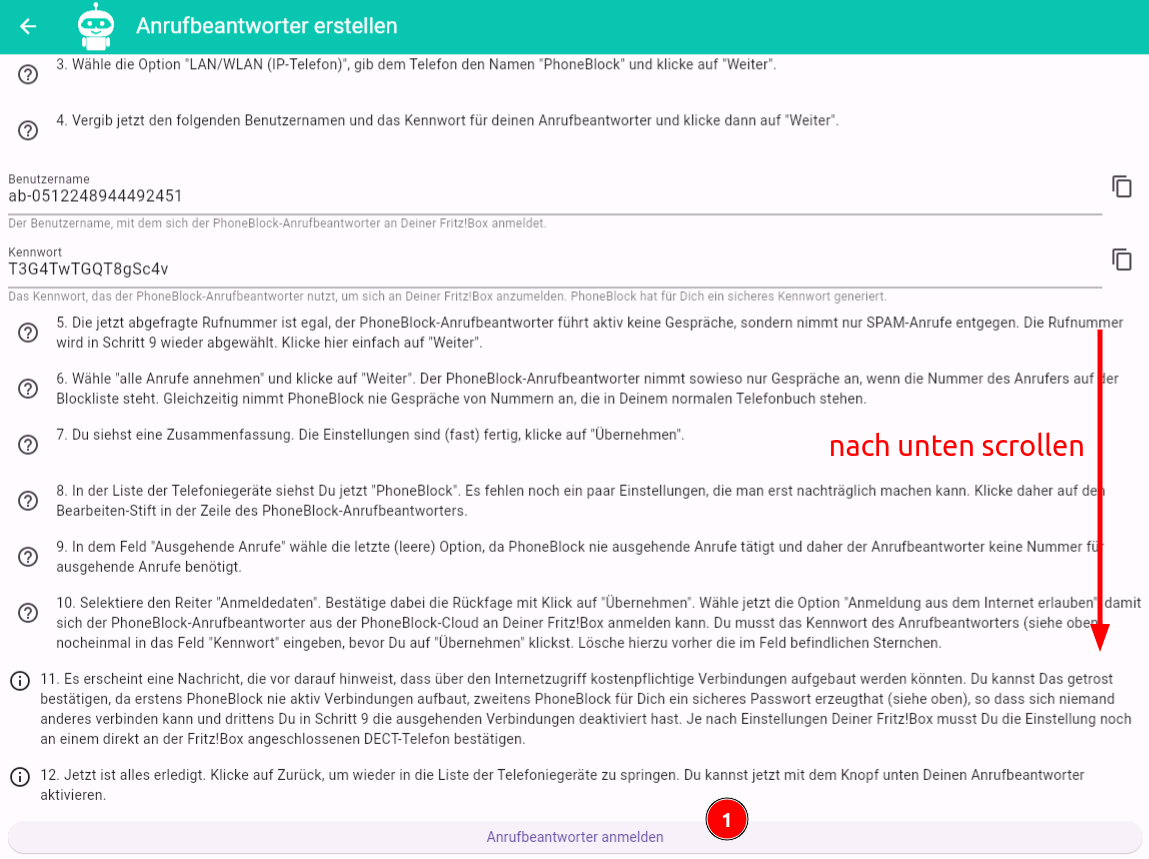
On the page "Set up phone for outgoing calls" you can simply click "Next". The PhoneBlock answering machine does not need a phone number for outgoing calls because it never actively makes calls. We will deactivate this number in a later step so that your answering machine really cannot make any calls.
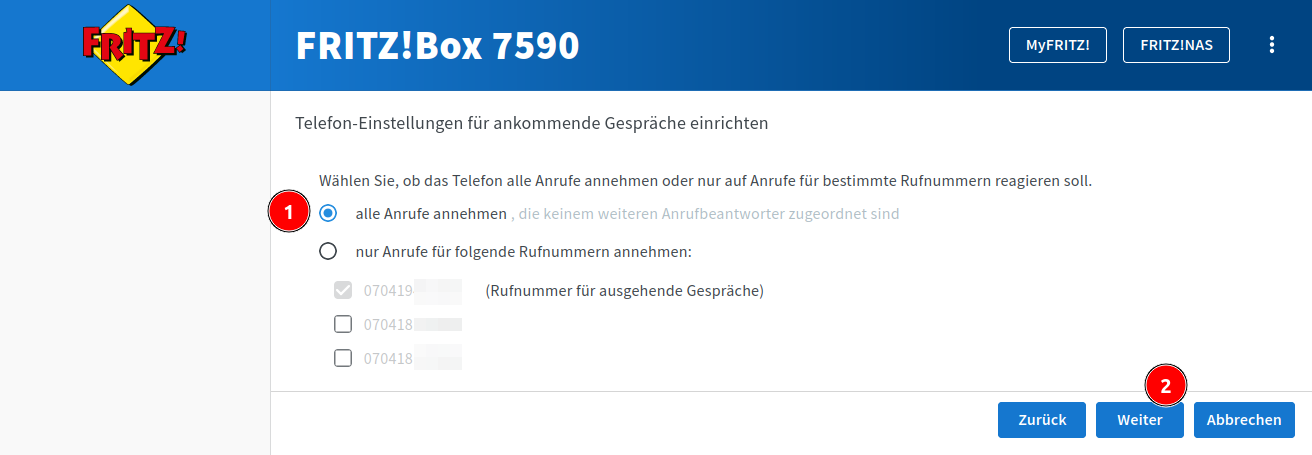
Select numbers to be protected
On the "Set up phone settings for incoming calls" page, you should leave the default setting "Accept all calls". If you only want to protect certain numbers from SPAM calls, you can also select the numbers for which the answering machine will see a call at all. Click on "Next".
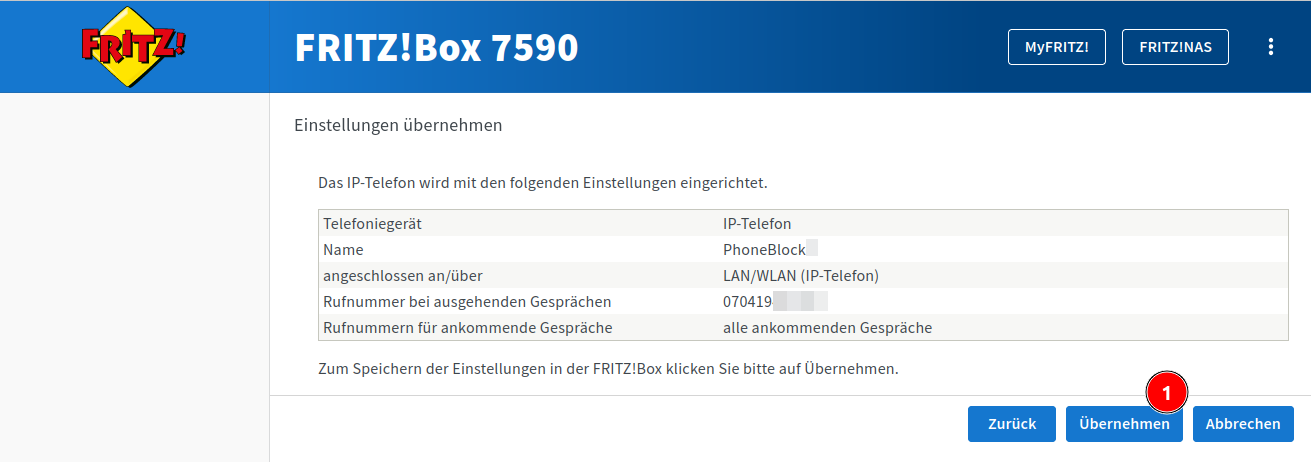
Confirm configuration
You will now be taken to the "Apply settings" summary page. You can check the settings you have made again and confirm them with "Apply".
Finish configuring the device
You are back in the "Device overview". You should now see your new answering machine "PhoneBlock" in the list. However, before you can switch on the answering machine, you need to make further settings. To do this, click on the edit pencil at the end of the PhoneBlock line.

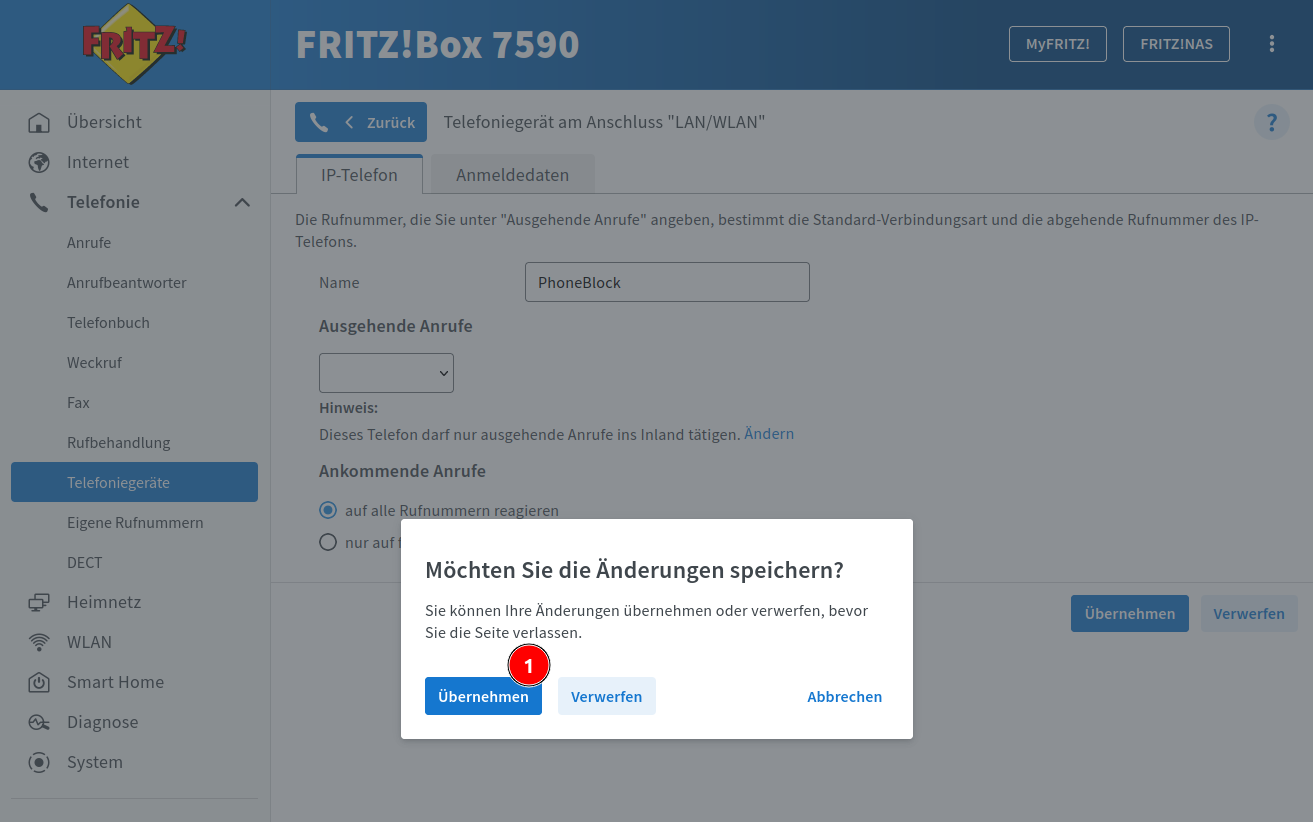
Stop outgoing calls
In the "Outgoing calls" selection field, you can now select the last empty entry to ensure that your answering machine cannot make calls on its own. Do not click on the Apply button at the bottom, but on the second tab "Login data". You will now be asked whether you want to save the changes. Click on "Apply" in this dialog.
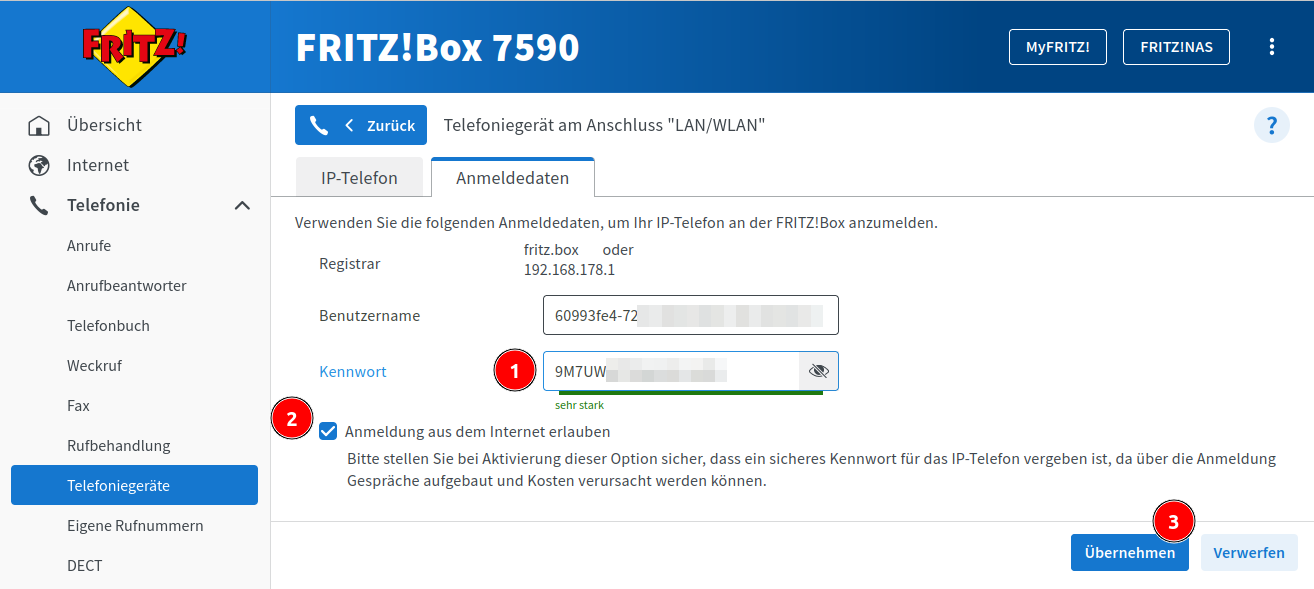
Allow login from the Internet
In the "Login data" tab, you must now activate the "Allow login from the Internet" option and copy the password from the answering machine app again and enter it in the "Password" field. Only then click on the "Apply" button.
Step 5: Switching on the answering machine
The configuration of your answering machine is now complete. Switch back to the answering machine app and switch on your new answering machine.
Congratulations, if everything went well, the answering machine in the answering machine app should now be displayed in green as "switched on". The next unpleasant callers can discuss with PhoneBlock in the future.
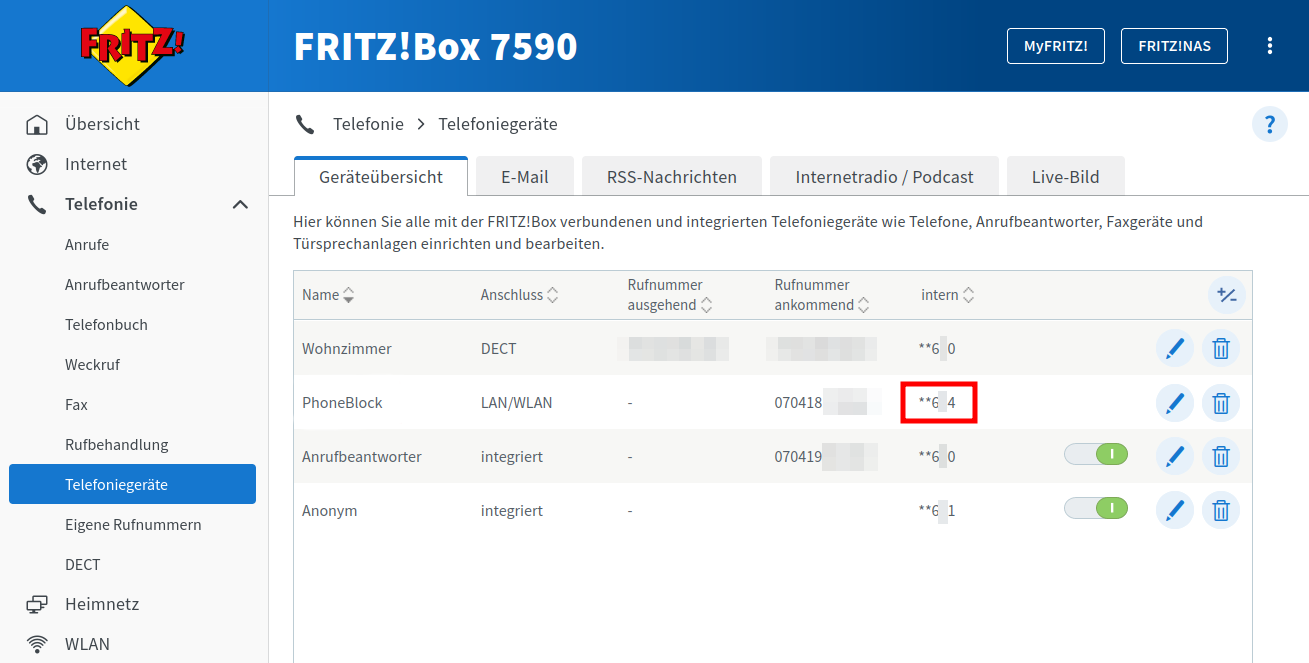
Step 6: Test the answering machine
If you want to try out how a call with the not quite everyday PhoneBlock answering machine works, you can call it from a telephone connected directly to the Fritz!Box (e.g. a DECT cordless telephone) via the internal number of the answering machine. The answering machine always accepts such test calls. Important: This works only via the internal number of the answering machine (usually starts with "**"). You can find the internal number in the device overview of your Fritz!Box in the "PhoneBlock" line. Why don't you try to estimate a photovoltaic system for him? Have fun!